
There are some great third party open source firmware available for the Netgear WNDR3800.
There is an OpenWR, a DD-WRT and a Tomato firmware available for NETGEAR's WNDR3800 router.
The different firmware can be downloaded from links below:
Below are the steps to install TPOS firmware on Netgear WNDR3800 router.
Installing TPOS firmware to WNDR3800 from Default (Stock) Netgear firmware:
STEP 1:
Type “192.168.1.1” in address bar of your browser to explore WebUI of WNDR3800.
Go to “ADVANCED -> Administration -> Firmware Upgrade” as shown in Figure 1.

fig.1
STEP 2:
Browse the “img” file [openwrt-ar71xx-wndr3800-squashfs-factory.img / ddwrt-wndr3800.img / tomato-wndr3800.img] downloaded from MyOpenRouter site and click upload. (fig :2 & fig: 3)

fig. 2

fig. 3
STEP 3:
Now it may show a warning if the image (to be upgraded) has a lower version than the existing original firmware (as depicted by the following snapshot). Ignore this warning and click on OK button.(fig: 4)

fig. 4
STEP 4:
Next it will show the version info of the existing firmware (Stock firmware) and the TPOS firmware which you want to upload in your router. Click on “yes” option to upgrade the router with your target image.(fig: 5)
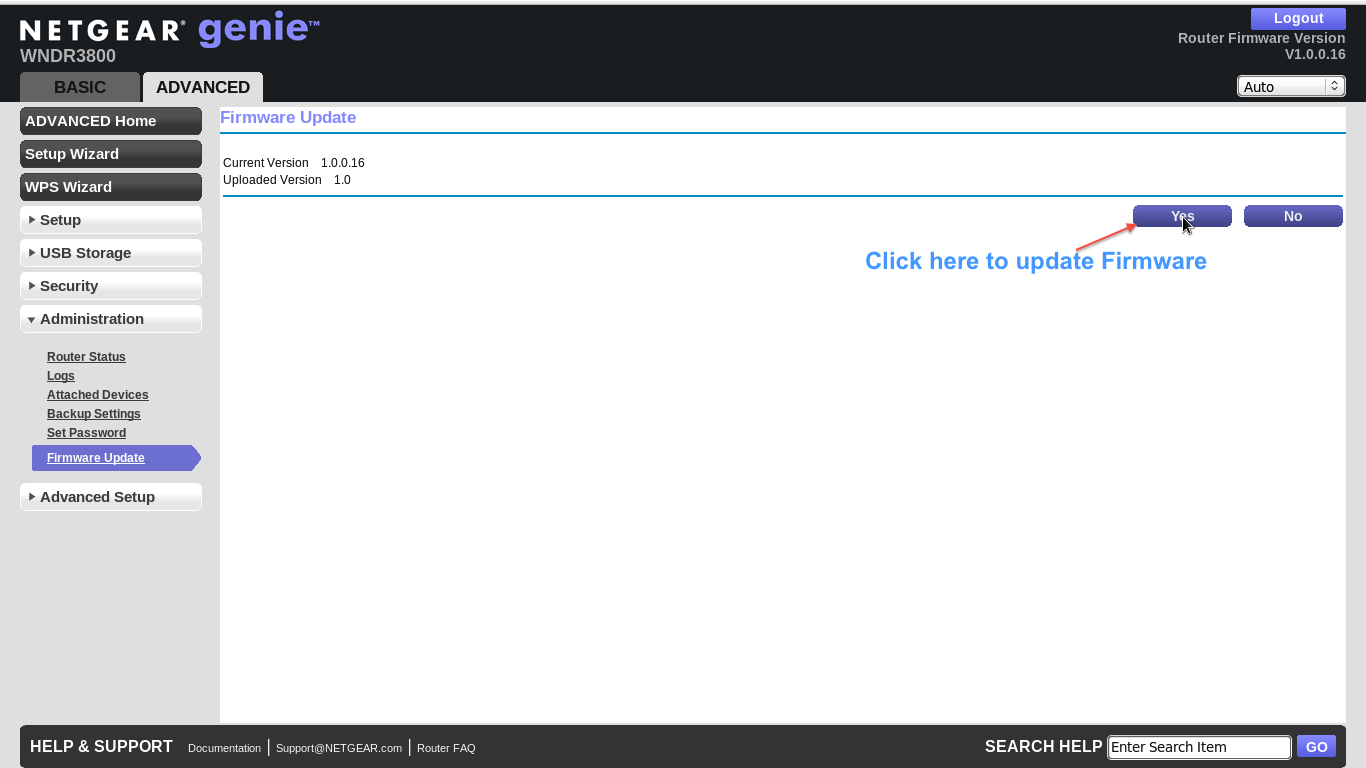
fig.5
STEP 5:
Now the router should start uploading the target firmware. Wait until the image is flashed. You should be able to see the following pages successively.(fig: 6 & fig: 7)
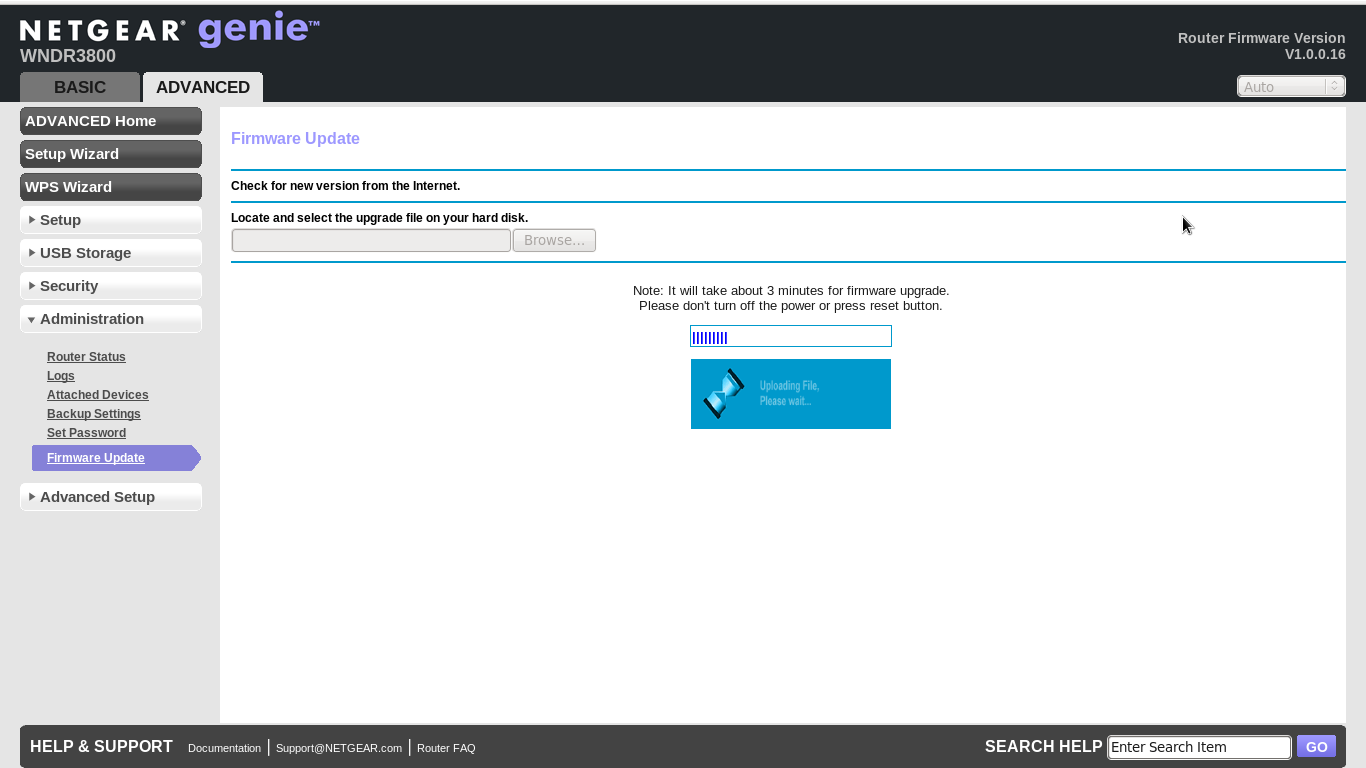
fig. 6

fig. 7
STEP 6:
Now type “192.168.1.1” in address bar of your browser and hit enter to get the OpenWRT/DDWRT/Tomato WebUI page.(fig: 8 & fig: 9 & fig: 10)
OpenWRT:-

fig. 8
DDWRT:-

fig. 9
Tomato:-

fig. 10
** If you are having any problem in this step then clear your browser cache and repeat step 6.
Note: -
For OpenWRT,
- Default username : root
- Default password : void (the password field need not to be populated and click on the login button).
For DDWRT firmware,
- Default username : root
- Default password : admin
For Tomato firmware,
- Default username : admin
- Default password : admin
** After first time login, it is advised to change username and password for security reasons.
How to Install Open Source Firmware to the WNDR3800 Using a Serial Cable:
STEP 1:
Run minicom from Linux machine. Configure the baud rate (115200 8N1) and your device properly . Connect the one end of serial cable to your router and another end to your PC.
The pin configuration of router serial console pins are explained in the following two pictures (fig 11 & fig 12)
i) WNDR3800 Without Serial Cable connected :-

fig. 11
ii) WNDR3800 With Serial Cable Connected :-

fig. 12
STEP 2:
Connect your PC to the LAN port of WNDR3800 with a straight cable and assign a IP “192.168.1.X” in your PC (assuming the router's default IP is 192.168.1.1).
STEP 3:
Now switch on your WNDR3800. You must be able to -
i) See router's booting log in minicom.
ii) Ping 192.168.1.1 (router's default IP) from your PC, as soon as router finishes it's booting.
STEP 4:
Now to enter in boot prompt you have to perform the following steps,
i) Reboot your router.
ii) Hit enter when the message “Hit any key to stop autoboot: “ comes at the minicom screen. (You will be given 1 second to hit the enter key, if you don't press any key meanwhile the router starts booting automatically).
Following picture (fig: 13) depicts how your screen will look if you are able to enter boot prompt.

fig. 13
STEP 5:
Now type “bootm” and hit enter to go into “TFTP Server Firmware Recovery mode” (fig: 14).
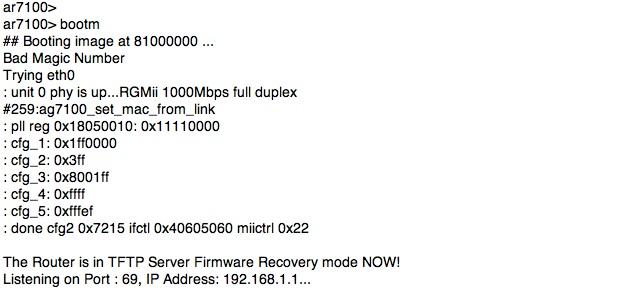
fig. 14
STEP 6:
Now go to the directory in your Linux machine containing the “img” file you have downloaded from MyOpenRouter site and upload the “img” file using the following command ,
“ tftp -m binary 192.168.1.1 -c put “
Example:-
i) For OpenWRT:-
“ tftp -m binary 192.168.1.1 -c put openwrt-ar71xx-wndr3800-squashfs-factory.img “
ii) For DDWRT:-
“ tftp -m binary 192.168.1.1 -c put ddwrt-wndr3800.img “
iii) For Tomato:-
“ tftp -m binary 192.168.1.1 -c put tomato-wndr3800.img “
STEP 7:
Now the image will be written in your router flash and will be rebooted automatically after successful write.
After certain time open your internet browser and type 192.168.1.1, you will have OpenWRT/DDWRT/Tomato WebUI to configure your router.
Congratulation, your TPOS firmware is now ready to use!
ok, i understand the pins on the routerboard.
But which connector is on the pc side?
Is there a 9 pin serial port?
which pins are used there?
I have used uSB to serial converter for this purpose.
How to install client torrent with open source firmware in net gear wndr 3800?
tanks
FP
I installed the Gargoyle + OpenWrt features and was the best choice I made
AW
[email protected]