

Recently, myself and Matt Whitlock, from TechLore.com, were able to test out the new WNHDEB111 Wireless-N Networking Kit (or "bridge" as some call it) from NETGEAR. Historically, my experiences with networking have usually been rife with stress and difficulties in getting everything to sync up and work properly.
With this new kit, I was shown that not all networking has to be difficult! I am very impressed with many facets of this new product, and I'd like to share with you my first experiences in using it. What you can expect from this article is a non-overly-technical overview of what's inside the box and what the WNHDEB111 looks like, along with the initial setup procedures and experience. You'll want to stay tuned for more detailed technical tests!
First, though, let's kick this off with an overview (or for some of you who have read the data sheet, a refresher) of what the WNHDEB111 Networking Kit can do!
WNHDEB111 Networking Kit By NETGEAR - An Overview
Basically, the WNHDEB111 Networking Kit consists of two separate WNHDE111 units that can act as either Wireless Access Point or bridge, and is designed to auto-configure depending on your needs. It takes advantage of the super-fast Wireless-N standard, and is ideal for streaming high-definition video over your network, or for high speed online gaming. Its QoS (Quality of Service) engine will ensure that your data streams will work smoothly. (Click the images for larger versions in the image gallery!)

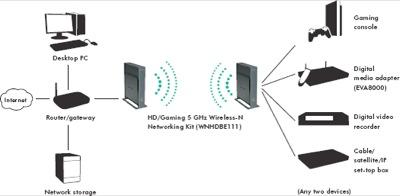
In addition, since it takes advantage of Wireless-N, you'll encounter less interference and significantly better range.
To wrap it all up, this networking kit is an ideal solution for:
- Anyone who plans to stream HD video over their home network, to a NETGEAR Digital Entertainer HD, TiVo HD, Slingbox, or other network attached devices, such as a ReadyNAS Duo
- Anyone with a large home where additional range and protection from interference is needed
- Anyone who needs additional wireless channels to be available
- Anyone who wants their Wireless-N enabled devices, such as a laptop, to take advantage of higher data speeds
Let's head to the unboxing, shall we?
Unboxing the WNHDEB111
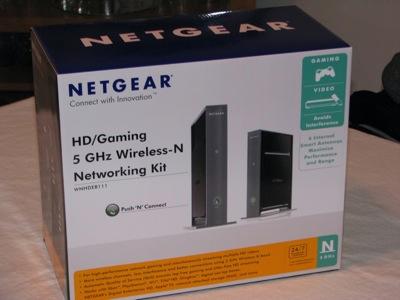
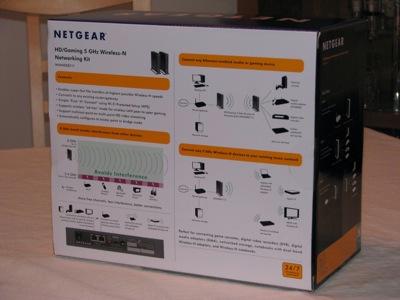
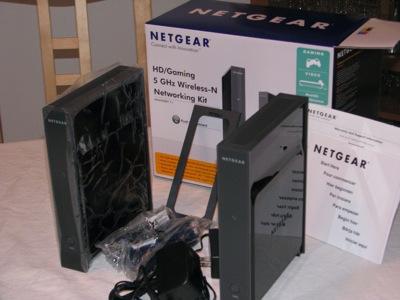
No matter what it is, whether it's a new cellphone, video game system, router, hard drive, video card, anything - it's EXCITING to crack open that new shiny box of tech goodness. Geeky, I know, but I can't resist. Here's some photos of the outside of the box (click for larger:)
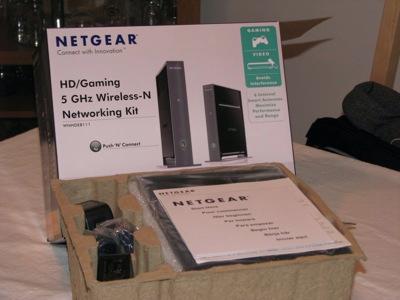
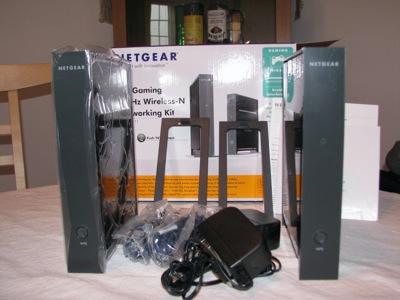
Upon unveiling the units inside, you're met with a very well-packed box but is yet not impossible to open, like some consumer electronics I've unboxed. The units arrived in perfect, untainted shape, protected by baggies and sticky protective film, which, when removed, unveil the glossy black finish of the WNHDE111 units.
Let's move on forward to some more detail on the WNHDE111 units themselves.
The WNHDE111 Units Up-Close
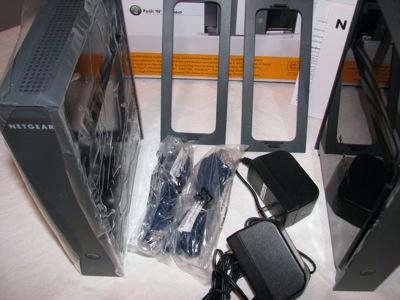
I'll mention again the glossy black finish of the units. I would recommend giving them a good polish and handling them with a cloth, because while their shiny obelisk-like construction is impressive, they fingerprint easily! (I hate fingerprints on my gear, don't you?) I was also surprised at the weight of the units, they feel sturdy and well-made, but are surprisingly light. Check out some of the photos (click for larger:)
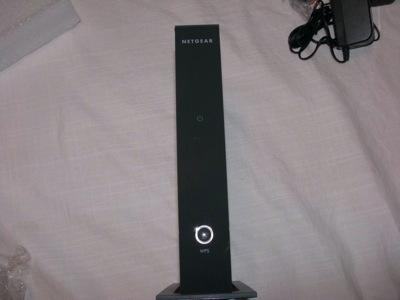
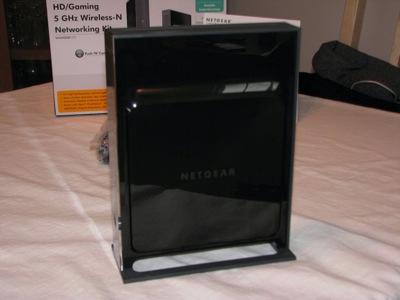
Their vertical construction means they would fit easily on most people's desktops, work area, etc. - and it did exactly that in the system we tested. It nestled itself quite nicely in with our other already present equipment, its green light happily blinking away (we're getting to having it up and running soon) and its shiny black finish kept everything looking sharp.
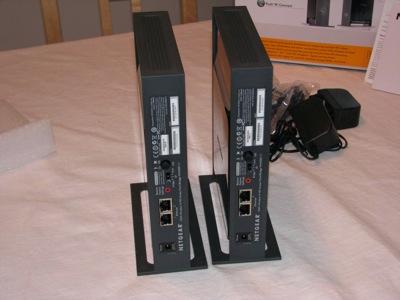
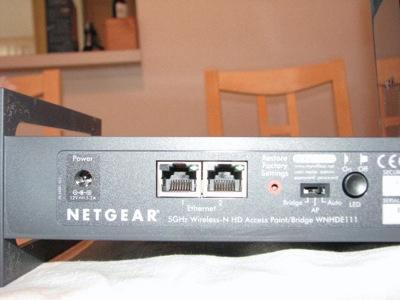
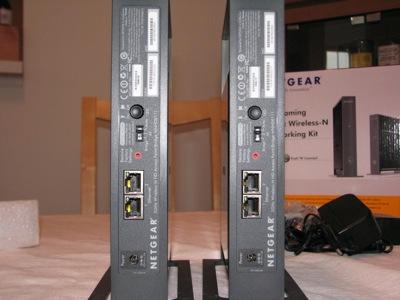
WNHDE111 Back Panel
Here's some close-up shots of the back panel of the WNHDE111 units included in the kit. You'll notice that the back panel is quite simple - two Ethernet ports, a switch for you to select bridge mode, access point mode, or auto mode, and the power connection. (Click for larger images.)
So now, you must be wondering - how do I get all of this set up? I'm going to go over our first basic setup experience with the kit - onward!
Setting up and Testing the WNHDEB111 Kit
This section is going to go faster than you think - setup and use of the networking kit was super fast and easy. First, we plugged one of the units directly into the gigabit router in our setup with an Ethernet connection.
Second, we placed the other unit upstairs by our computer setup and powered them both on, and plugged a laptop (Windows based) into this second unit via Ethernet. The units automatically configured and connected, and provided a hard wired connection immediately.
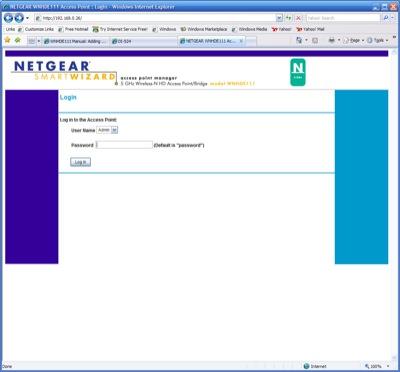
Logging into the access point, using the following screen, is simple - just type in the IP of the access point, then the standard login and password will follow (which you should definitely change later.)
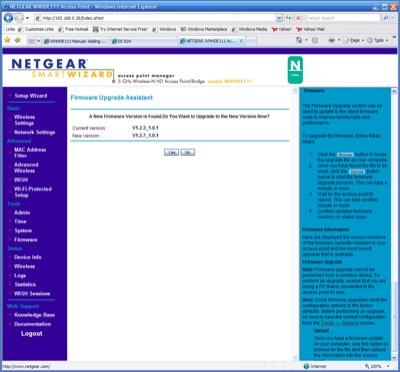
Once logged in, it immediately checks for a firmware update. As of this time, there was an update available, and we instructed it to go ahead and download and install the firmware. This takes a few minutes, after which the units must reboot, and therefore your connection will go down momentarily, so don't panic.
After the firmware upgrade was complete, it was time to test the wireless connection. Unfortunately, we did not have a Wireless-N enabled device to test, but my MacBook supports 802.11a, which the WNHDEB111 supports also.
The unit automatically creates a wireless access point, entitled "NETGEAR-HD," that after the initial setup (which was very simple) was easy to connect to, and provided plenty of speed for my mobile Internet connection. No unusual settings, tweaking, or extensive technical knowledge is really required to get this rig up and running. I was especially grateful that no special settings seemed to be necessary for it to function properly on my Mac, which I have encountered in the past with other networking products and previous versions of Mac OS. It connected just as easily to the Windows laptop as it did to my Mac.
Conclusions
I will once again say that I am impressed with the usability and ease of setup that the WNHDEB111 kit provides. It was literally just as simple as plug in and go, but also provides extensive options to protect and customize any wireless setup. In other words, it provides appeal to advanced users looking for a tweakable, high-speed streaming solution, or for everyday users looking for a simple, strong wireless bridging solution for their home. We used the WNHDEB111 kit for our Internet connection throughout the rest of the day, and experienced no lost connections or breaks in speed. For more details on this great kit, follow the links below.
Data Sheet on the WNHDEB111 | More Wireless-N Products from NETGEAR
Thanks for publishing this. I've been thinking about getting a NetGear router for my house, but wasn't really sure if it would suit my needs. After all you can't always believe the specs on the outside of the box right? Anyway, you answered many of my questions and I think now I'm ready to buy. Thanks!
Regards,
Sam
cctv
NETGEAR Router Firewall security would teach you how to use the NETGEAR router firewall to enhance the security of your perimeter routers.
Security Camera System